Theatre of Blood/Entry Mode
In Entry Mode, the player is given an unlimited amount of deaths to try to finish the raid. Hardcore ironmen will lose their status on the first death. Each death takes away from the loot available at the end of the raid.
After killing the Pestilent Bloat and Sotetseg, the chest may be investigated to find ten bandages. These bandages act as a shark, prayer, stamina, super combat and super ranging potion (which also boosts Magic by the same scaling) in one. Leftover bandages in the supply chest do not carry over from each boss unlike the points system in normal mode.
Entry Mode is safe for Ultimate Ironmen using an Item Retrieval Service to store their items.
Theatre Walkthrough
Read the Notice board in the middle of Ver Sinhaza and create or join a party. Note that while you're free to invite up to four other players to join this raid with you, the quest's difficulty scaling makes it possible to complete an Entry Mode raid by yourself; completing a normal or hard mode raid with a team will also finish the quest.
You will have to defeat 6 bosses to progress:
Like in the normal Theatre, the bosses must all be defeated in one session; losing or leaving the raid means it must be started over. In Entry Mode, the bosses have reduced stats and deal ~50% less damage than in normal mode. Due to this, Entry Mode is only recommended for players learning the bosses' mechanics and various tactics, as the fight itself is drastically different in normal and hard mode.
In Entry Mode, your Hitpoints and Prayer are replenished after defeating each boss, meaning that it may be wise to avoid eating to full if a boss is almost dead. Keep this in mind as you progress through the Theatre.
For the Theatre, bringing the following is strongly recommended:
- Gear for all three combat styles (although magic armour should not be required, only a magic weapon) - the player should be on the Ancient Magicks
- A method of inflicting poison or venom, such as a toxic blowpipe, dragon dagger(p++), or abyssal tentacle
- Fast weapons for each attack style to kill many weak enemies quickly (4- or 3-tick weapons preferred)
- A stamina potion
- At least 6 Saradomin brews, and one super restore per three brews
- The remaining inventory space should be high-healing food
Players will be able to stock up on ten bandages after the second and fourth bosses. Due to these bandages boosting the player's stats, combat potions and ranging potions are not necessary except for the first two bosses, and the inventory space would be better used by bringing more food or Saradomin brews. It is also possible to boost with a potion before entering, then bank the potion and withdraw another piece of food. Upon death in the verzik room, more bandages are provided to the player which is helpful for continuing to learn mechanics.
The Maiden of Sugadinti
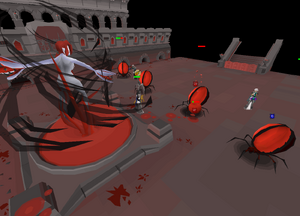
The first boss the player must face, the Maiden of Sugadinti is a nymph-like being who was formerly a Meiyerditch citizen. The vampyres spread a rumour that she successfully completed the Theatre of Blood to encourage Meiyerditch citizens to attempt it themselves; in reality, however, she gave her body to experimentation to save her brother.
Solo strategy
Due to her high magic defence, it's recommended to use Melee or Ranged to fight the Maiden, and to pray Protect from Magic along with Piety or Eagle Eye/Rigour. Every few attacks she will drain your current combat style, but in Entry Mode you should be able to kill her before your stats are drained too much.
The Maiden has three attacks: blood puddles, blood spawns, and Nylocas.
| Mechanic | Information |
|---|---|
| Normal attacks | Magic; preventable with Prayer. Every few attacks will drain your combat stats. |
| Blood puddles | The Maiden shoots blood at the player, forming 1-tile puddles that cause rapid damage when stood on, and heal Maiden for the damage taken. They can be avoided by moving at least 3 tiles away every time the Maiden attacks, as she uses a different attack animation for these. They are easy to dodge if using ranged. |
| Blood spawn | 1-4 blood spawns will appear: they will move around randomly and leave a trail of blood puddles behind them. If possible, avoid fighting them; Ranged may be useful if you need to kill them. Melee combat will cause you to take rapid damage due to your proximity, so keep your distance. |
| Nylocas Matomenos | At 70%, 50%, and 30% health, she will spawn a red Nylocas Matomenos on either side of the arena, which will walk towards her. The nylocas should be killed before they reach the Maiden, or it will heal her. Switching to a Ranged weapon to kill them is beneficial. In normal mode, these would be frozen with Ancient Magicks but this is unnecessary in Entry Mode as they have very low health. Even if not killed, it is beneficial to damage them, as this reduces the amount they heal the Maiden. |
The Maiden can be used as a litmus test for your preparation for the rest of the Entry Mode Theatre. If you find that you're using more than four pieces of your food and one Prayer or Restore dose on the Maiden, it's a sign that you might need to practice the boss, and either train your stats or upgrade your gear before moving further; conservation of supplies is critical to a successful completion, even with reduced difficulty.
Pestilent Bloat
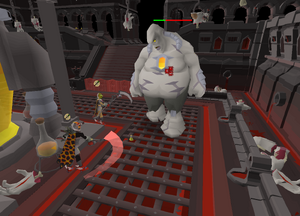
The gigantic undead mass known as the Pestilent Bloat is the second boss of the Theatre, made up of various creatures including ogres and cyclopes. Melee gear and stamina potions are needed for this section.
Solo strategy
While a Salve amulet is very useful to use on bloat due to him being undead, it is not necessary to use it to beat him in Entry Mode; if the player does bring a Salve amulet, it's recommended that they bring either an unimbued one or an enchanted one so that they can drop it after killing Bloat, as it is useless for the rest of the Theatre and you can use the extra space to hold more supplies. It's inadvisable to kill Bloat with Ranged or Magic, as his magic and ranged defences are simply too high for them to prove effective. It's highly recommended to bring a Stamina potion for the Bloat, as your run energy may deplete to 0 otherwise while avoiding attacks.
The Bloat sends out flies that will rapidly damage the player if they're within his line of sight while moving. The damage can be somewhat reduced by using Protect from Missiles, although it is preferable to try to avoid the damage altogether by attacking only when he stops moving. To avoid this attack, always stand on the opposite side of the central pillar from him.
To begin, enter the barrier when Bloat is on the other side of the pillar, and remain on the other side of the pillar from him as he moves. Prepare to attack Bloat when he stops moving and falls to his knees; during this time, the player can safely do four (or five with good timing) attacks with a 4-tick weapon and then run back behind the pillar. Each time after he stops kneeling, Bloat will rise up and do a stomp, dealing massive damage (although heavily reduced in Entry Mode). This can be avoided by moving out of his line of sight. After Bloat's first stomp, severed limbs will fall from the ceiling; you must run to avoid them (see below).
Be wary as Bloat will not always move at the same speed, and he'll also change directions. Depending on the number of attacks he takes when he's down, he will change speed. Try not to run too much while hiding behind the pillar unless you have to.
| Mechanic | Information |
|---|---|
| Flies | Ranged; semi-preventable with Prayer. Avoidable completely by moving out of his line of sight (highly recommended). |
| Stomp | Not avoidable with Prayer. Run away and out of his line of sight to avoid it. |
| Severed limbs | 1-tile limbs that fall from the ceiling. There will be ground shadows that will show where the limb will land, allowing you to move away. If the player is hit by one, they will take damage and be stunned; due to this, the Bloat may catch up and rapidly damage you if you're hit. |
After defeating the Pestilent Bloat, players will have access to the first supply chest. During Entry Mode this will always contain 10 bandages. Bandages are superior to most foods, as it not only heals 20 Hitpoints (the same as a shark), but it also slightly restores Prayer and run energy, applies the effects of a super combat potion and ranging potion, boosts Magic with the same scaling of a ranging potion (rather than a flat +4 like a traditional Magic potion), and gives the bonus of a stamina potion. Entering the door next to it will lead to the lair of the Nylocas. Because of this reward, if you find that you have more than 10 empty spaces after defeating the Bloat, it's a sign you may need to practice further.
The Nylocas

In the Nylocas chamber the player(s) must clear a large swarm of Nylocas spread out over 30 waves, a species of arachnids that each require a specific combat style to be defeated. You will need all three attack styles for this room. The main two goals here are to survive and keep the pillars alive; one does not have to kill every single Nylocas to accomplish this.
The blue Nylocas Hagios use Magic, the grey Nylocas Ischyros use Melee, and the green Nylocas Toxobolos use Ranged. Each Nylocas can only be damaged by the combat style it uses. A bar will represent your progress towards defeating the horde; after defeating the vast number of enemies, the boss Nylocas Vasilias will drop into the arena. Ancient Magicks is highly recommended, and a fast ranged weapon such as a magic shortbow or toxic blowpipe will make this room much easier. If you have a melee weapon with a 3-tick attack speed, such as the goblin paint cannon, ham joint, or swift blade, it may be recommended to take it to Nylocas due to them being faster than most melee weapons.
Solo strategy
Nylocas will spawn in waves from the three paths, the player can attack them at range before they reach the arena platform, but cannot melee them until they reach said platform. Some of the Nylocas will attack the pillars, but others will head towards the centre to attack the player; these are known as "aggros" by the community, and must be killed as fast as possible to mitigate damage taken. If a pillar dies, the party will take massive damage. If all pillars die, the encounter will fail, and the party will wipe. Despite this, aggros should take priority over Nylocas attacking the pillars, to reduce supplies used. Note that any time you attack a Nylocas with the wrong style, it will become immune to all further attacks.
When larger Nylocas die, they will split into two smaller Nylocas, with random colours. Keep in mind that Nylocas also have a timed life, after which they will explode and deal about 8 damage in Entry Mode. This damage can be avoided by being at least two tiles away. Solo Entry Mode 'smalls' have two Hitpoints, and 'larges' have three.
In general, it's best to stay near the centre of the arena as much as possible, unless you are cleaning up greys (Melee). Focus the green (Ranged) Nylocas first. Because one can attack at a faster tick rate with Ranged, they can clear up the greens faster than they would clean up the blues and greys, and therefore have overall fewer Nylocas to deal with.
Ice barrage/burst any clumps of Nylocas you will not be dealing with. Frozen nylocas cannot attack the pillars until unfrozen, even if they are in melee range, and all colours can be frozen. Due to the timed life nature of the nylocas, this significantly reduces the damage they will deal in their life, and is therefore highly recommended. Keep in mind, freezing non-magic Nylocas means you will no longer be able to do damage to them, so they will only be removed from the arena when they explode.
| Mechanic | Information |
|---|---|
| Colour | Green requires Ranged, blue requires Magic, and grey requires Melee. Attacking with the wrong style renders the Nylocas impervious to damage. |
| Timed death | After a fixed amount of time, Nylocas will explode, dealing damage within two tiles. |
| Pillars | Pillars at 0 health will collapse, dealing 30+ damage. This can stack up, as pillars often fall at similar times; it's best to let one that's low die and focus on the other three. |
Nylocas Vasilias
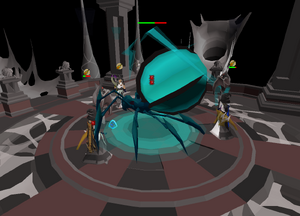
The Nylocas Vasilias always starts grey, but will change colours after 10 ticks (6 seconds) requiring switching of prayers and styles to mitigate and inflict damage respectively. When the boss switches colour, it is recommended to first change protection prayers, then weapon, then attack accordingly. The player's character will stop their attacks on the boss when it switches colours, allowing the player to instead focus on switching their weapons and prayers, and then re-attack. The boss will never remain in the same form twice in a row.
Sotetseg
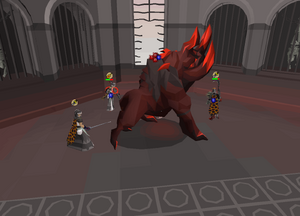
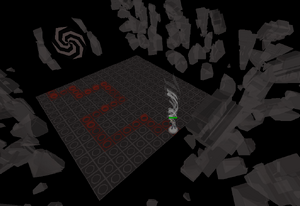
Sotetseg, a corrupted dark beast, is the fourth boss of the Theatre.
Solo strategy
Sotetseg stands at the far north of the arena. It launches two types of small projectiles, either red or grey. The red one can be completely blocked with Protect from Magic, while the grey one can be completely blocked with Protect from Missiles. Failing to protect against either of these projectiles will prevent the player from using protection prayers for a short period of time. Sotetseg can also attack with an inaccurate but high-hitting melee attack if the player is in melee range. After every 10 attacks, Sotetseg launches a large red ball that cannot be protected against. When soloing in Entry Mode, this projectile will deal 15 damage. When in groups of two or more, this can hit 70+. All players stacking on one tile can share the damage. Note that Melee attacks do not count towards this large red ball attack, therefore it is best to attack Sotetseg with Melee, praying Protect from Melee and switching to the other two protection prayers when you see their respective projectile. A simpler strategy for players with high defence is to tank the melee hits and focus on praying against the projectiles.
At 66.6% and 33.3% health, Sotetseg will transport the player into the shadow realm. They must follow the red path on the tiled ground and click on the portal to return you to the arena. Every 7 ticks (4.2 seconds) the player will also take 1 to 3 chip damage. Failing to follow the path will deal damage equal to 6.67% of the player's current Hitpoints + 11 every tick and is likely to kill the player.
Note that even though Sotetseg is a dark beast, it is not affected by a Slayer task, meaning the bonuses of the Slayer helm will not apply towards it.
After defeating Sotetseg, the second and final supply chest will become available. Like the first, it will always contain 10 bandages in Entry Mode. This is the last chance to stock up on supplies before Xarpus and Verzik.
Xarpus

Xarpus, the king of the Yarasa and the last of its kind, is the fifth boss of the Theatre. Protection prayers have no effect during the fight, so prayer points can be used instead to boost damage.
First phase
Xarpus stands at the centre of the arena, severely weakened. He channels the energy of the ground, exhuming skeletons. They launch green projectiles towards him, which rapidly heal him. Simply run around the arena standing on any exhumeds that appear to prevent them from healing Xarpus.
Second phase
After all of the skeletons have spawned, Xarpus will stand up and begin to attack, starting off with the health he has by the end of the first phase. His only attack is launching poison projectiles at the player's current location. These deal damage in a 3x3 area, and create a permanent 1-tile puddle of poison that remains there for the rest of the fight, dealing some damage if you stand or run over it. The best strategy is to use Ranged, moving in a clockwise or counter-clockwise pattern exactly 2 tiles at a time to avoid the poison. It is possible to bait Xarpus into poisoning each tile twice, halving the rate at which the arena is covered, by moving just before you see the projectile is about to hit you. Start as far away from Xarpus as your weapon will allow, slowly moving towards him if necessary.
Alternatively, as Xarpus is weaker to melee than ranged, the player can choose to melee him. Meleeing Xarpus is much more complex as the player has to make sure that all the melee tiles aren't "ragged", so players must utilise a special formation to minimise the amount of ragging while ensuring that he can still be attacked with melee. Learning how to melee in Entry Mode will prove significantly useful in normal and hard mode.
Third phase
Xarpus will screech when below 22.5% health, and will stop launching poison around the arena, instead staring intently at one of the four quadrants. Attacking Xarpus while standing in the quadrant he is looking at will cause him to retaliate with a high-hitting poison attack. There is no time limit for this phase, so it can be taken slowly and carefully. Simply stay in one location, attacking Xarpus once with Melee when he turns to face one of the other quadrants, then click on the ground to stop attacking. With some practise you can make two attacks with a 4-tick weapon. Do not get too close to Xarpus, or he will throw pebbles that deal rapid tick damage.
After defeating Xarpus, a player must pick up the Dawnbringer from the skeleton by the door that leads to the final room.
Verzik Vitur
Verzik Vitur is the hostess and final boss of the Theatre. Players should prepare for a very challenging three-phase fight. There are no pauses between phases, so it is imperative to understand the mechanics of each phase before starting. Expect to die repeatedly while learning. Entry mode allows unlimited deaths and provides bandages to players after each failed attempt. However, it is best to retain every bit of non-bandage healing you can for the main attempt. In the second and third phases Verzik has high magic defence and is weak to slash, but ranged is also viable.
First phase
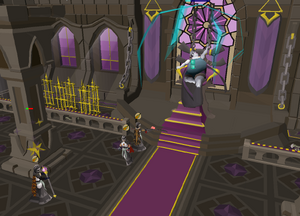
After talking to Verzik and confirming the player's party is ready, they must take turns using Dawnbringer's special attack to heavily damage Verzik's shield, which takes around 2-4 special attacks in total. Any other weapon has a much lower chance at hitting, along with a capped maximum hit. Verzik will charge up magic attacks that can be blocked entirely by hiding behind one of the pillars (although each pillar can only take a certain number of hits), while Protect from Magic will partially reduce the damage. Hide behind a pillar before each of her attacks, then emerge and use Dawnbringer's special attack; if in a team, drop Dawnbringer once you have used your special attacks so someone else can use it. Upon dealing the final hit to Verzik, move away from the pillars as they will all collapse, dealing significant damage to anyone standing next to them.
Second phase
Verzik will now leave her throne, flying to the middle of the room as the remaining pillars collapse. Her attacks in this phase are as follows:
- Every 4 ticks she will throw an urn-shaped bomb towards the party members. This deals ranged damage which can be partially reduced by Protect from Missiles, but should generally be avoided by moving one tile away.
- If players stand next to Verzik on her bomb attack, she will slam the ground, knocking players back and stunning them for several seconds - which will also result in you being guaranteed to get hit by one bomb. If using melee, it is necessary to use a tick-perfect method to avoid this attack. When you hear the 'creak' sound effect of her throwing a bomb, click to attack, then immediately move one tile backwards. This needs to be done for every single attack on her.
- After every four bomb attacks she will launch a blue electric ball that can largely be ignored in a solo raid. If there are multiple people in your party, all players should stand close to Verzik on opposite sides to bounce the ball between her and each other, greatly reducing its damage.
- She will summon grey, green or blue Nylocas that will pick a random target and explode on contact with them. Players should either kill them from a distance with ranged, or just run away until they explode on their own.
- Occasionally she will summon one purple Nylocas Athanatos which will heal her, kill it with your poisoned weapon (dragon dagger P++ recommended).
- She will summon two red Nylocas Matomenos, and after a certain amount of time Verzik will heal for any health they have left. DO NOT attack her while she summons them or immediately after, as any damage dealt will instead heal her. The Nylocas can be damaged without poison (unlike the purple Nylocas). They should be killed or damaged as much as possible to reduce the amount Verzik heals.
- Upon reaching 35% health, she will begin prioritising a red magic attack over ranged, so swap to Protect from Magic.

To summarise, start by praying against ranged. When attacking Verzik, make sure to move every time she throws a bomb. The most reliable timing for this is to move when you hear the audio cue. Always make sure not to stand in melee range for long, and keep an eye out for the exploding Nylocas. DO NOT attack her while she summons them or immediately after, as any damage dealt will instead heal her. Use your poisoned weapon to kill the purple Nylocas when they appear, and switch to Protect from Magic at 35% health.
Because Entry Mode has unlimited attempts and bandages replenish each attempt, the mechanics can be explored gradually. However, the player should ideally practice tick-perfect 4 or 5-tick walks as these are essentially required in normal and hard mode; outside of the nylocas, the other mechanics are easy to deal with.
Third phase
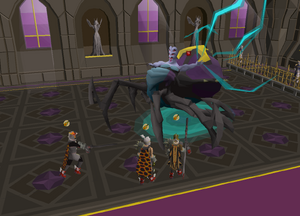
Verzik lands onto the floor, turning into a vampyre-nylocas hybrid. During this phase she has Melee, Ranged, and Magic normal attacks with an attack speed of 7, as well as four special attacks which will be used in a fixed, repeating order.
Pray against her magic and ranged attacks. When she stomps her front legs and a dark green swirl appears around her pray Ranged, and when a bright blue electric aura appears under her pray Magic. Praying correctly will block most of the damage from these attacks, and damage is calculated upon impact.
She'll focus on a single player at a time and follow them around the room, so keep your distance when possible. If the targeted player is within melee distance, she may use a crush based melee attack which hits harder than her projectiles, cannot be prayed against, and damages everyone next to her. The targeted player can use careful timing to prevent this attack by either stepping away or walking under her when the attack begins. More simply, the player can move after each of their own attacks.
Verzik's special attacks are as follows:
- Nylocas - Like the previous phase, she will summon a random generic Nylocas that follow a player and explode upon contact for high damage or after a set amount of time.
- Webs - Verzik goes to the centre of the room and starts shooting out webs. When soloing, players should avoid the webs by running in a tight circle around Verzik. In a team, players can free teammates that get webbed by attacking the web; otherwise, it will snap and deal damage depending on how much health the web has left. The web's health depends on the amount of team members in the raid. If a player gets stuck, the other team members should deal as much damage to the web as they can with Ranged or Magic whilst avoiding becoming trapped themselves.
- Yellow pools - Verzik becomes invulnerable and charges up a powerful attack from her abdomen. Yellow pools (one for each player) will appear around the arena, which players should stand on to fully protect themselves against the incoming attack. Two players cannot share the same pool. Do not leave your pool until after the projectile Verzik shoots has hit you.
- Green ball - Verzik launches a green ball at a player. The ball must be bounced three times to allow it to dissipate safely. If the ball hits a player with no one in range, or hits the same player twice, the ball will explode for heavy damage. If soloing, be prepared to take unavoidable damage.
Verzik will use four of her normal attacks followed by a special attack in the exact order given above: spider spawn, webs, yellow projectiles, green ball. The cycle will repeat once completed.
When she reaches 20% of her hitpoints, she will shout "I'm not done with you yet!"- her attack speed will increase to 5, and she will summon a purple tornado for every player in the room, which slowly homes in on them. If players are hit by a tornado, it will cut their current hitpoints in half and she'll heal for a percentage of the damage dealt. The tornado must be avoided by continually moving around the room (a bandage can be used for its stamina potion effect). While the tornadoes are active she will continue using all of her special attacks in the same order, making this the most difficult part of the fight. In particular, if she uses her yellow pools attack it can be extremely difficult to dodge both this and the tornado, so make certain to keep your health as high as possible. Depending on her current spot in her attack rotation, it can be worth it to delay hitting Verzik below 20% until just after the yellow projectile attack so that she has to go through a full attack cycle again.
To summarise, do not stay in melee range for long and switch between praying Protect from Missiles and Protect from Magic according to her attack animations. Keep your health high and deal with each special attack in the listed order. When the tornadoes appear, move constantly to avoid them while continuing to deal with her normal and special attacks.
Combat Achievements
There are 0 Combat Achievement tasks (totalling 0 points) available for Theatre of Blood: Entry Mode.
| Name | Description | Type | Tier | Comp% |
|---|
| Ver Sinhaza | |||||||||||||||||||
|---|---|---|---|---|---|---|---|---|---|---|---|---|---|---|---|---|---|---|---|
| NPCs (inside) |
| ||||||||||||||||||
| Items |
| ||||||||||||||||||
| Rewards |
| ||||||||||||||||||
| Scenery | |||||||||||||||||||
| Music | |||||||||||||||||||
| Related | |||||||||||||||||||
