Treasure Trails/Guide/Coordinates/Master
During a Treasure Trail, a coordinate clue is a clue scroll that contains a set of coordinates. Much like the real-world longitude and latitude geographic coordinate system, where angular coordinates correspond to your north-south and east-west position, coordinates in Old School RuneScape indicate a precise point somewhere on the surface where the next clue scroll, or potentially the treasure casket, is buried. Coordinates are presented in the following format:
03 degrees 00 minutes north/south
02 degrees 00 minutes east/west
In Old School RuneScape, one square of space is equivalent to 15/8 (1.875) minutes of arc. 0°00' degrees north and 0°00' degrees east is located in the middle of the Observatory. <mapframe align="right" frameless="" plane="0" width="200" y="3161" x="2440" height="200" zoom="2" mapID="0">
{"features":[{"type":"Feature","geometry":{"coordinates":[[[2435,3156],[2435,3166],[2445,3166],[2445,3156]]],"type":"Polygon"},"properties":{"mapID":0,"plane":0,"description":"
X/Y: 2440,3161
"}}],"type":"FeatureCollection"}
</mapframe>
Although a chart, sextant and watch may be used to determine one's present coordinates, players only need a spade in their inventory to dig up the clue.
On hard Treasure Trails, digging on the correct spot will cause a level 108 Saradomin wizard to appear, which must be defeated before the next clue scroll or the treasure casket may be dug up. If the coordinates are located in the Wilderness, a weaker level 65 Zamorak wizard will appear instead, which must also be defeated in order to dig up the next clue scroll or the treasure casket. Saradomin wizards are poisonous and use both Melee, using a Dragon dagger (p++), and the Magic spell Saradomin Strike. It is advised to wear dragonhide armour and use the Protect from Melee prayer when fighting Saradomin wizards. Zamorak wizards use only the spell Flames of Zamorak. It is advised to use the Protect from Magic prayer when fighting the Zamorak wizard in the Wilderness, and to look out for player-killers, as other players can interrupt your fight.
On elite Treasure Trails, digging on the correct spot will cause either a level 97 Armadylean guard or a level 125 Bandosian guard to appear, which must be defeated before the next clue scroll or the treasure casket may be dug up. Armadylean guards must be killed with either Ranged or Magic attacks, since they are in the form of an Aviansie. It is advised to use the Protect from Missiles prayer when fighting them, and Protect from Melee when fighting Bandosian guards.
On master Treasure Trails, digging in the correct spot will cause either three Ancient Wizards (levels 112, 98, 98) in multi-combat to appear, or a level 140 Brassican Mage, which need to be defeated before the next clue scroll or the treasure casket may be dug up. If the coordinates are located in a multi-combat area, three Ancient wizards, each attacking with a unique attack style, will appear. Melee wizards are poisonous, with poison dealing 8 damage to a player. In single-combat zones, a Brassican Mage will appear, and its attacks cannot be stopped by protection prayers.
Following is a list of all known coordinate clues and their corresponding locations. The list is organised into ascending numerical value (for example, 00:00 north first, then 00:05 south, then 00:13 north, continuing accordingly). Shorthand writing is used together with normal writing. An example: 09°34'N, 25°12'E = 09 degrees and 34 minutes north, 25 degrees and 12 minutes east. • Remember: You must have a spade with you to dig up coordinate clues.
Note that some of the clues may require skill or quest requirements before you will be able to get to that location.' These quests, which must be finished or partially completed, include: Bone Voyage, Regicide, Legends' Quest, Nature Spirit, The Grand Tree, Fairytale II - Cure a Queen, Troll Stronghold, Cabin Fever, The Fremennik Trials, and Watchtower. Some coordinates will also require a certain skill levels to complete the clue, though the required level is low.
Master Coordinates
| Coordinates | Shorthand | Requirements | Fight |
|---|---|---|---|
| .| degrees }}| N| minutes north}}| S| minutes south}}| E| minutes east}}| W| minutes west}} | degrees |.}}}}| minutes}}|north|N}}|south|S}}|east|E}}|west|W}} | Regicide | Brassican Mage |
| Image | Map | ||

|

| ||
| Location notes | |||
| In the hunter area directly south of the Iorwerth Camp, past a stick trap, dig by the north-east edge of the pond. An Iorwerth camp teleport can greatly reduce the difficulty in reaching this position.
From Lletya: Pass the tree, go west across the tripwire, continue west through the dense forest. Turn north and up the path to Prifddinas. Before the bridge and the water, head west through the dense forest. Then, keep going west past the leaves pitfall trap, then south-west past a stick trap. From Port Tyras: Go north through dense forest then east; go south through dense forest; step over tripwire; go east through the dense forest then north-west for quite a while; jump over the leaves. Finally, continue west till you arrive at an elven lamp next to mushrooms. Head south down the small path to the pond. Pass the stick trap and dig by the north-east edge of the pond. This clue can be frustrating due to the frequency of activating the stick traps, which deal significant amounts of damage. There is a better success rate of passing the trap by turning off run and walking past the trap. It's recommended to follow this map in order to not get lost. | |||
| Coordinates | Shorthand | Requirements | Fight |
|---|---|---|---|
| {{#replace:{{#replace:{{#replace:{{#replace:{{#replace:01 degrees 54 minutes south, 08 degrees 54 minutes west|.| degrees }}| N| minutes north}}| S| minutes south}}| E| minutes east}}| W| minutes west}} |
{{#replace:{{#replace:{{#replace:{{#replace:{{#replace:{{#replace:{{#replace:01 degrees 54 minutes south, 08 degrees 54 minutes west| degrees |.}}}}| minutes}}|north|N}}|south|S}}|east|E}}|west|W}} |
Partial completion of Regicide | Brassican Mage |
| Image | Map | ||

|
| ||
| Location notes | |||
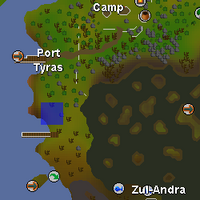
| South of Port Tyras, easily accessible by charter ship or fairy ring code BJS (requires | |||
| Coordinates | Shorthand | Requirements | Fight |
|---|---|---|---|
| .| degrees }}| N| minutes north}}| S| minutes south}}| E| minutes east}}| W| minutes west}} | degrees |.}}}}| minutes}}|north|N}}|south|S}}|east|E}}|west|W}} | Partial completion of Fairytale II - Cure a Queen for access to fairy rings. | Brassican Mage |
| Image | Map | ||
|
| ||
| Location notes | |||
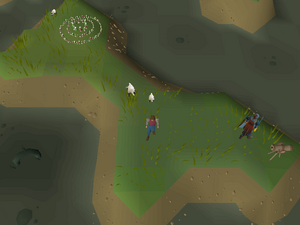
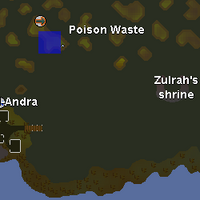
| Fairy ring (DLR) at the Poison Waste. | |||
| Coordinates | Shorthand | Requirements | Fight |
|---|---|---|---|
| {{#replace:{{#replace:{{#replace:{{#replace:{{#replace:03 degrees 09 minutes south, 43 degrees 26 minutes east|.| degrees }}| N| minutes north}}| S| minutes south}}| E| minutes east}}| W| minutes west}} |
{{#replace:{{#replace:{{#replace:{{#replace:{{#replace:{{#replace:{{#replace:03 degrees 09 minutes south, 43 degrees 26 minutes east| degrees |.}}}}| minutes}}|north|N}}|south|S}}|east|E}}|west|W}} |
Cabin Fever | Brassican Mage |
| Image | Map | ||
|

| ||
| Location notes | |||
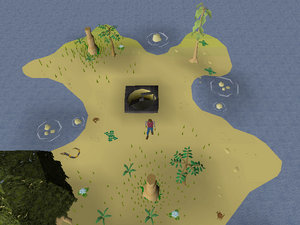
| Small island located north-east of Mos Le'Harmless, accessible through the eastern staircase located at the north-east corner of the Mos Le'Harmless Cave. Remember to wear a Witchwood icon when traversing the dungeon, as well as bringing a light source for players who haven't lit the fire pit (requires completion of Making Friends with My Arm). | |||
| Coordinates | Shorthand | Requirements | Fight |
|---|---|---|---|
| {{#replace:{{#replace:{{#replace:{{#replace:{{#replace:03 degrees 26 minutes north,
12 degrees 18 minutes east|.| degrees }}| N| minutes north}}| S| minutes south}}| E| minutes east}}| W| minutes west}} |
{{#replace:{{#replace:{{#replace:{{#replace:{{#replace:{{#replace:{{#replace:03 degrees 26 minutes north,
12 degrees 18 minutes east| degrees |.}}}}| minutes}}|north|N}}|south|S}}|east|E}}|west|W}} |
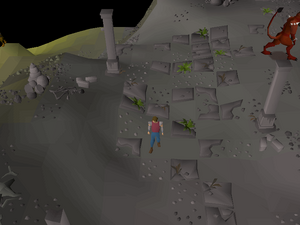
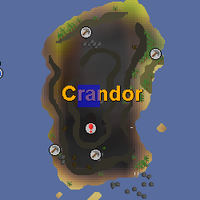
Partial completion of Dragon Slayer I | Brassican Mage |
| Image | Map | ||
|
| ||
| Location notes | |||
| Crandor, centre of the island. | |||
| Coordinates | Shorthand | Requirements | Fight |
|---|---|---|---|
| {{#replace:{{#replace:{{#replace:{{#replace:{{#replace:03 degrees 50 minutes north,
09 degrees 07 minutes east|.| degrees }}| N| minutes north}}| S| minutes south}}| E| minutes east}}| W| minutes west}} |
{{#replace:{{#replace:{{#replace:{{#replace:{{#replace:{{#replace:{{#replace:03 degrees 50 minutes north,
09 degrees 07 minutes east| degrees |.}}}}| minutes}}|north|N}}|south|S}}|east|E}}|west|W}} |
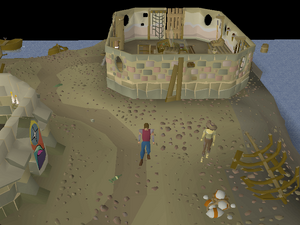
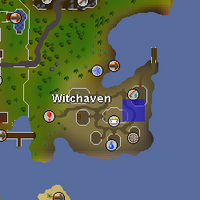
None. | Brassican Mage |
| Image | Map | ||
|
| ||
| Location notes | |||
| Witchaven, east from the chapel. | |||
| Coordinates | Shorthand | Requirements | Fight |
|---|---|---|---|
| {{#replace:{{#replace:{{#replace:{{#replace:{{#replace:04 degrees 58 minutes north, 36 degrees 56 minutes east|.| degrees }}| N| minutes north}}| S| minutes south}}| E| minutes east}}| W| minutes west}} |
{{#replace:{{#replace:{{#replace:{{#replace:{{#replace:{{#replace:{{#replace:04 degrees 58 minutes north, 36 degrees 56 minutes east| degrees |.}}}}| minutes}}|north|N}}|south|S}}|east|E}}|west|W}} |
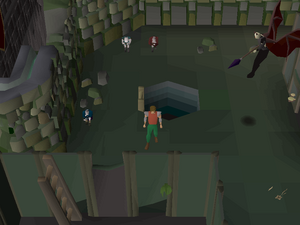
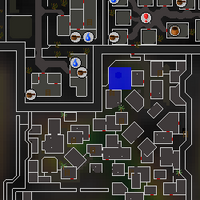
Partial completion of Darkness of Hallowvale | Brassican Mage |
| Image | Map | ||
|
| ||
| Location notes | |||
| Located outside the entrance to the Meiyerditch Mine. An easy way to reach the mine is to ask a vyrewatch to send you to the mines, and then mining 15 daeyalt ores to leave. | |||
| Coordinates | Shorthand | Requirements | Fight |
|---|---|---|---|
| {{#replace:{{#replace:{{#replace:{{#replace:{{#replace:05 degrees 13 minutes north, 04 degrees 16 minutes west|.| degrees }}| N| minutes north}}| S| minutes south}}| E| minutes east}}| W| minutes west}} |
{{#replace:{{#replace:{{#replace:{{#replace:{{#replace:{{#replace:{{#replace:05 degrees 13 minutes north, 04 degrees 16 minutes west| degrees |.}}}}| minutes}}|north|N}}|south|S}}|east|E}}|west|W}} |
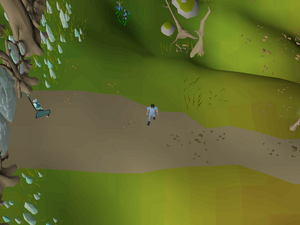
Partial completion of Regicide | Brassican Mage |
| Image | Map | ||
|

| ||
| Location notes | |||
| East of the eastern entrance to Prifddinas. Be careful to not dig 1 tile east as it is in multi-combat and will spawn Ancient Wizards instead. | |||
| Coordinates | Shorthand | Requirements | Fight |
|---|---|---|---|
| {{#replace:{{#replace:{{#replace:{{#replace:{{#replace:07 degrees 37 minutes north, 35 degrees 18 minutes east|.| degrees }}| N| minutes north}}| S| minutes south}}| E| minutes east}}| W| minutes west}} |
{{#replace:{{#replace:{{#replace:{{#replace:{{#replace:{{#replace:{{#replace:07 degrees 37 minutes north, 35 degrees 18 minutes east| degrees |.}}}}| minutes}}|north|N}}|south|S}}|east|E}}|west|W}} |
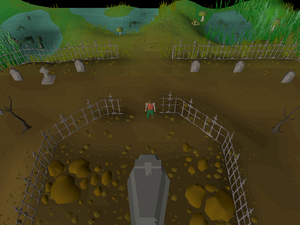
None. | Brassican Mage |
| Image | Map | ||
|

| ||
| Location notes | |||
| The graveyard where players fight Dessous during Desert Treasure I. | |||
| Coordinates | Shorthand | Requirements | Fight |
|---|---|---|---|
| {{#replace:{{#replace:{{#replace:{{#replace:{{#replace:08 degrees 01 minutes north, 20 degrees 58 minutes west|.| degrees }}| N| minutes north}}| S| minutes south}}| E| minutes east}}| W| minutes west}} |
{{#replace:{{#replace:{{#replace:{{#replace:{{#replace:{{#replace:{{#replace:08 degrees 01 minutes north, 20 degrees 58 minutes west| degrees |.}}}}| minutes}}|north|N}}|south|S}}|east|E}}|west|W}} |
None. | Ancient Wizards |
| Image | Map | ||

|
| ||
| Location notes | |||
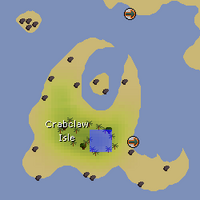
| On Crabclaw Isle. Players must pay Sandicrahb 10,000 coins to reach the island, though this is reduced in half if the easy Kourend & Kebos Diary is completed, or free if the medium Kourend & Kebos Diary is completed. | |||
| Coordinates | Shorthand | Requirements | Fight |
|---|---|---|---|
| {{#replace:{{#replace:{{#replace:{{#replace:{{#replace:08 degrees 11 minutes north, 12 degrees 30 minutes east|.| degrees }}| N| minutes north}}| S| minutes south}}| E| minutes east}}| W| minutes west}} |
{{#replace:{{#replace:{{#replace:{{#replace:{{#replace:{{#replace:{{#replace:08 degrees 11 minutes north, 12 degrees 30 minutes east| degrees |.}}}}| minutes}}|north|N}}|south|S}}|east|E}}|west|W}} |
None. | Brassican Mage |
| Image | Map | ||
|

| ||
| Location notes | |||
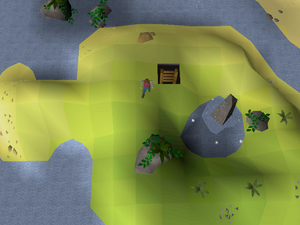
| Next to the ladder on the Water Obelisk Island. | |||
| Coordinates | Shorthand | Requirements | Fight |
|---|---|---|---|
| {{#replace:{{#replace:{{#replace:{{#replace:{{#replace:12 degrees 35 minutes north, 36 degrees 22 minutes east|.| degrees }}| N| minutes north}}| S| minutes south}}| E| minutes east}}| W| minutes west}} |
{{#replace:{{#replace:{{#replace:{{#replace:{{#replace:{{#replace:{{#replace:12 degrees 35 minutes north, 36 degrees 22 minutes east| degrees |.}}}}| minutes}}|north|N}}|south|S}}|east|E}}|west|W}} |
Brassican Mage | |
| Image | Map | ||
|

| ||
| Location notes | |||
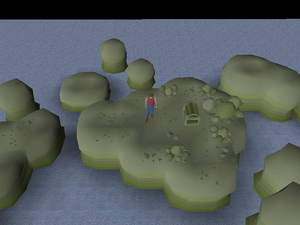
| Dig on the rocks, north of the wrecked ship, outside of Port Phasmatys. Climb the ladder of the wrecked ship, cross the gangplank, and jump on the rocks until the end is reached. Each jump requires 5% of your running energy. | |||
| Coordinates | Shorthand | Requirements | Fight |
|---|---|---|---|
| {{#replace:{{#replace:{{#replace:{{#replace:{{#replace:12 degrees 45 minutes north, 20 degrees 09 minutes east|.| degrees }}| N| minutes north}}| S| minutes south}}| E| minutes east}}| W| minutes west}} |
{{#replace:{{#replace:{{#replace:{{#replace:{{#replace:{{#replace:{{#replace:12 degrees 45 minutes north, 20 degrees 09 minutes east| degrees |.}}}}| minutes}}|north|N}}|south|S}}|east|E}}|west|W}} |
None. | Brassican Mage |
| Image | Map | ||

|
| ||
| Location notes | |||
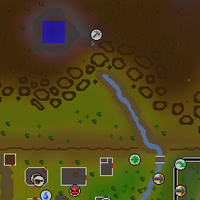
| By the Obelisk of Air in the Wilderness. Must be accessed through the Edgeville Dungeon. | |||
| Coordinates | Shorthand | Requirements | Fight |
|---|---|---|---|
| {{#replace:{{#replace:{{#replace:{{#replace:{{#replace:13 degrees 33 minutes south, 15 degrees 26 minutes east|.| degrees }}| N| minutes north}}| S| minutes south}}| E| minutes east}}| W| minutes west}} |
{{#replace:{{#replace:{{#replace:{{#replace:{{#replace:{{#replace:{{#replace:13 degrees 33 minutes south, 15 degrees 26 minutes east| degrees |.}}}}| minutes}}|north|N}}|south|S}}|east|E}}|west|W}} |
Partial completion of Monkey Madness I | Brassican Mage |
| Image | Map | ||
|
| ||
| Location notes | |||
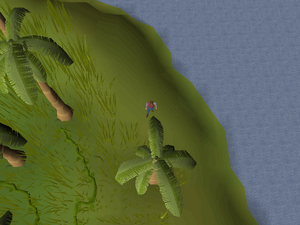
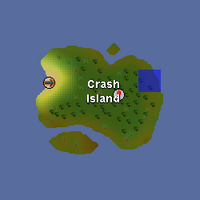
| Eastern shore of Crash Island. | |||
| Coordinates | Shorthand | Requirements | Fight |
|---|---|---|---|
| {{#replace:{{#replace:{{#replace:{{#replace:{{#replace:16 degrees 41 minutes north, 30 degrees 54 minutes west|.| degrees }}| N| minutes north}}| S| minutes south}}| E| minutes east}}| W| minutes west}} |
{{#replace:{{#replace:{{#replace:{{#replace:{{#replace:{{#replace:{{#replace:16 degrees 41 minutes north, 30 degrees 54 minutes west| degrees |.}}}}| minutes}}|north|N}}|south|S}}|east|E}}|west|W}} |
None. | Ancient Wizards |
| Image | Map | ||
|
| ||
| Location notes | |||
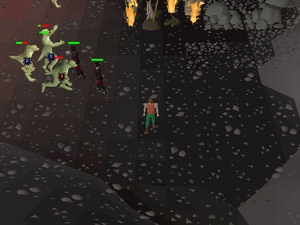
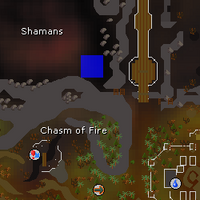
| By the lizardman shaman area west of Lizardman Canyon. | |||
| Coordinates | Shorthand | Requirements | Fight |
|---|---|---|---|
| {{#replace:{{#replace:{{#replace:{{#replace:{{#replace:18 degrees 03 minutes north, 03 degrees 03 minutes east|.| degrees }}| N| minutes north}}| S| minutes south}}| E| minutes east}}| W| minutes west}} |
{{#replace:{{#replace:{{#replace:{{#replace:{{#replace:{{#replace:{{#replace:18 degrees 03 minutes north, 03 degrees 03 minutes east| degrees |.}}}}| minutes}}|north|N}}|south|S}}|east|E}}|west|W}} |
1,000 coins (or completion of The Fremennik Trials) | Brassican Mage |
| Image | Map | ||
|

| ||
| Location notes | |||
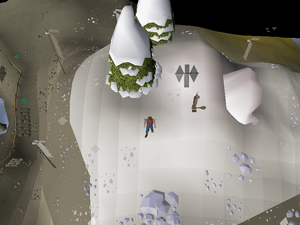
| On top of Waterbirth Island. Must be accessed through the dungeon. A pet rock/another player and a rune thrownaxe are required to reach the island's summit. | |||
| Coordinates | Shorthand | Requirements | Fight |
|---|---|---|---|
| {{#replace:{{#replace:{{#replace:{{#replace:{{#replace:18 degrees 26 minutes north, 37 degrees 15 minutes west|.| degrees }}| N| minutes north}}| S| minutes south}}| E| minutes east}}| W| minutes west}} |
{{#replace:{{#replace:{{#replace:{{#replace:{{#replace:{{#replace:{{#replace:18 degrees 26 minutes north, 37 degrees 15 minutes west| degrees |.}}}}| minutes}}|north|N}}|south|S}}|east|E}}|west|W}} |
Brassican Mage | |
| Image | Map | ||
|
| ||
| Location notes | |||
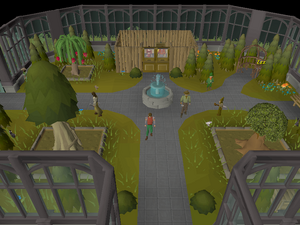
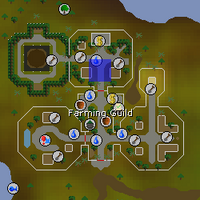
| In the north wing of the Farming Guild. | |||
| Coordinates | Shorthand | Requirements | Fight |
|---|---|---|---|
| {{#replace:{{#replace:{{#replace:{{#replace:{{#replace:19 degrees 43 minutes north, 23 degrees 11 minutes west|.| degrees }}| N| minutes north}}| S| minutes south}}| E| minutes east}}| W| minutes west}} |
{{#replace:{{#replace:{{#replace:{{#replace:{{#replace:{{#replace:{{#replace:19 degrees 43 minutes north, 23 degrees 11 minutes west| degrees |.}}}}| minutes}}|north|N}}|south|S}}|east|E}}|west|W}} |
None. | Ancient Wizards |
| Image | Map | ||
|

| ||
| Location notes | |||
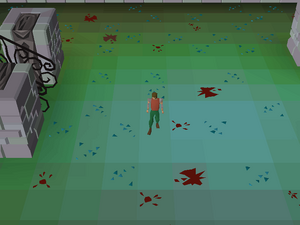
| The coordinate is located in the crypt of the Arceuus church. To reach the crypt, head to the church and climb up the stairs, and then, climb down the stairs that follow.
Players can make the ancient wizards unaggressive by going up the stairs and climbing down immediately. | |||
| Coordinates | Shorthand | Requirements | Fight |
|---|---|---|---|
| {{#replace:{{#replace:{{#replace:{{#replace:{{#replace:20 degrees 35 minutes north, 15 degrees 58 minutes east|.| degrees }}| N| minutes north}}| S| minutes south}}| E| minutes east}}| W| minutes west}} |
{{#replace:{{#replace:{{#replace:{{#replace:{{#replace:{{#replace:{{#replace:20 degrees 35 minutes north, 15 degrees 58 minutes east| degrees |.}}}}| minutes}}|north|N}}|south|S}}|east|E}}|west|W}} |
None. | Ancient Wizards |
| Image | Map | ||
|
| ||
| Location notes | |||
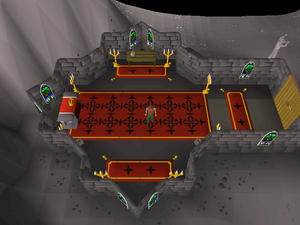
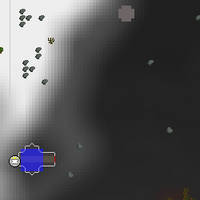
| North-west of The Forgotten Cemetery, at level 38 Wilderness, there is a Chaos Temple. Dig inside the building. A cemetery teleport can be used to reach the coordinates relatively quickly. | |||
| Coordinates | Shorthand | Requirements | Fight |
|---|---|---|---|
| {{#replace:{{#replace:{{#replace:{{#replace:{{#replace:20 degrees 45 minutes north, 7 degrees 26 degrees west|.| degrees }}| N| minutes north}}| S| minutes south}}| E| minutes east}}| W| minutes west}} |
{{#replace:{{#replace:{{#replace:{{#replace:{{#replace:{{#replace:{{#replace:20 degrees 45 minutes north, 7 degrees 26 degrees west| degrees |.}}}}| minutes}}|north|N}}|south|S}}|east|E}}|west|W}} |
Started Lunar Diplomacy to access Pirates' Cove | Ancient Wizards |
| Image | Map | ||
|

| ||
| Location notes | |||
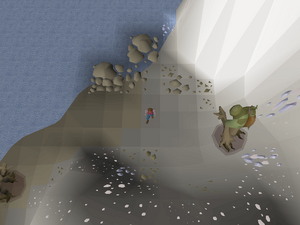
| Pirates' Cove | |||
| Coordinates | Shorthand | Requirements | Fight |
|---|---|---|---|
| {{#replace:{{#replace:{{#replace:{{#replace:{{#replace:21 degrees 37 minutes north, 21 degrees 13 minutes west|.| degrees }}| N| minutes north}}| S| minutes south}}| E| minutes east}}| W| minutes west}} |
{{#replace:{{#replace:{{#replace:{{#replace:{{#replace:{{#replace:{{#replace:21 degrees 37 minutes north, 21 degrees 13 minutes west| degrees |.}}}}| minutes}}|north|N}}|south|S}}|east|E}}|west|W}} |
None. | Brassican Mage |
| Image | Map | ||
|
| ||
| Location notes | |||
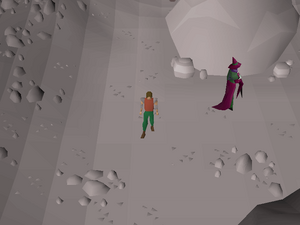
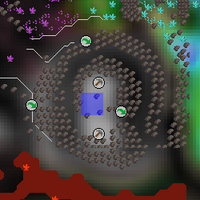
| In the dense essence mine. Easily reached with the fairy ring code CIS. | |||
| Coordinates | Shorthand | Requirements | Fight |
|---|---|---|---|
| {{#replace:{{#replace:{{#replace:{{#replace:{{#replace:21 degrees 56 minutes north, 10 degrees 56 minutes west|.| degrees }}| N| minutes north}}| S| minutes south}}| E| minutes east}}| W| minutes west}} |
{{#replace:{{#replace:{{#replace:{{#replace:{{#replace:{{#replace:{{#replace:21 degrees 56 minutes north, 10 degrees 56 minutes west| degrees |.}}}}| minutes}}|north|N}}|south|S}}|east|E}}|west|W}} |
Started Lunar Diplomacy | Ancient Wizards |
| Image | Map | ||

|
| ||
| Location notes | |||
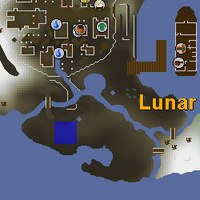
| On Lunar Isle, dig on the island west of the Astral Altar. | |||
| Coordinates | Shorthand | Requirements | Fight |
|---|---|---|---|
| {{#replace:{{#replace:{{#replace:{{#replace:{{#replace:22 degrees 24 minutes north, 31 degrees 11 minutes west|.| degrees }}| N| minutes north}}| S| minutes south}}| E| minutes east}}| W| minutes west}} |
{{#replace:{{#replace:{{#replace:{{#replace:{{#replace:{{#replace:{{#replace:22 degrees 24 minutes north, 31 degrees 11 minutes west| degrees |.}}}}| minutes}}|north|N}}|south|S}}|east|E}}|west|W}} |
None. | Brassican Mage |
| Image | Map | ||

|

| ||
| Location notes | |||
| Northern area of the sulphur mine in Lovakengj. | |||
| Coordinates | Shorthand | Requirements | Fight |
|---|---|---|---|
| .| degrees }}| N| minutes north}}| S| minutes south}}| E| minutes east}}| W| minutes west}} | degrees |.}}}}| minutes}}|north|N}}|south|S}}|east|E}}|west|W}} | None. | Ancient Wizards |
| Image | Map | ||
|
| ||
| Location notes | |||
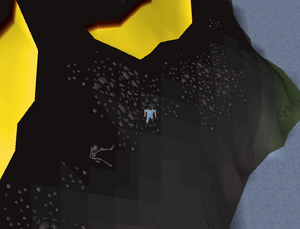
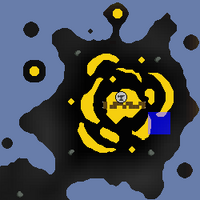
| Wilderness Volcano at level 51 Wilderness. | |||
| Coordinates | Shorthand | Requirements | Fight |
|---|---|---|---|
| {{#replace:{{#replace:{{#replace:{{#replace:{{#replace:24 degrees 18 minutes north, 23 degrees 22 minutes east|.| degrees }}| N| minutes north}}| S| minutes south}}| E| minutes east}}| W| minutes west}} |
{{#replace:{{#replace:{{#replace:{{#replace:{{#replace:{{#replace:{{#replace:24 degrees 18 minutes north, 23 degrees 22 minutes east| degrees |.}}}}| minutes}}|north|N}}|south|S}}|east|E}}|west|W}} |
None. | Brassican Mage |
| Image | Map | ||
|
| ||
| Location notes | |||
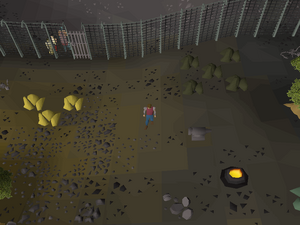
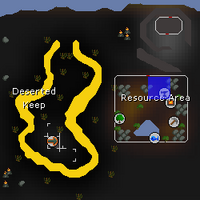
| Inside the Resource Area, near the anvil. Requires 7,500 coins to enter (or 6,000, 3,750 or no coins with medium, hard and elite Wilderness Diary respectively). | |||
| Coordinates | Shorthand | Requirements | Fight |
|---|---|---|---|
| {{#replace:{{#replace:{{#replace:{{#replace:{{#replace:24 degrees 22 minutes north, 27 degrees 00 minutes east|.| degrees }}| N| minutes north}}| S| minutes south}}| E| minutes east}}| W| minutes west}} |
{{#replace:{{#replace:{{#replace:{{#replace:{{#replace:{{#replace:{{#replace:24 degrees 22 minutes north, 27 degrees 00 minutes east| degrees |.}}}}| minutes}}|north|N}}|south|S}}|east|E}}|west|W}} |
None. | Ancient Wizards |
| Image | Map | ||

|

| ||
| Location notes | |||
| Outside Rogues' Castle, north of the Wilderness Obelisk. | |||
| Coordinates | Shorthand | Requirements | Fight |
|---|---|---|---|
| {{#replace:{{#replace:{{#replace:{{#replace:{{#replace:23 degrees 58 minutes north, 18 degrees 22 minutes east|.| degrees }}| N| minutes north}}| S| minutes south}}| E| minutes east}}| W| minutes west}} |
{{#replace:{{#replace:{{#replace:{{#replace:{{#replace:{{#replace:{{#replace:23 degrees 58 minutes north, 18 degrees 22 minutes east| degrees |.}}}}| minutes}}|north|N}}|south|S}}|east|E}}|west|W}} |
Brassican Mage | |
| Image | Map | ||
|
| ||
| Location notes | |||
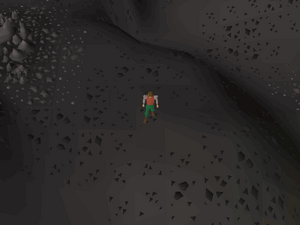
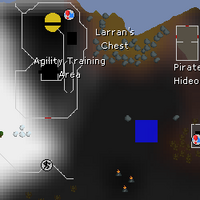
| South-east of the Wilderness Agility Course. | |||