In Aid of the Myreque
| In Aid of the Myreque (#101) | ||||
|---|---|---|---|---|
| ||||
| Released | 22 March 2006 (Update) | |||
| Members | Yes | |||
| Quest series | Myreque, #2 | |||
| Lead developer(s) | Tytn H | |||
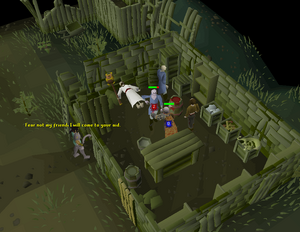
In Aid of the Myreque is the second quest in the Myreque quest series, and follows the events of In Search of the Myreque. After discovering the secret group called the Myreque, the player must now help them move to a new location in Burgh de Rott, where they would be closer to the heart of their vampyre oppressors.
- Warning: You need to be on normal spellbook to complete this quest, since you need to cast Lvl-1 Enchant.
Details
| Start point | X/Y: 3506,9839 ","group":"pins","icon":"greenPin","plane":0,"title":"Start point"}}],"type":"FeatureCollection"} </maplink> |
|---|---|
| Official difficulty | Intermediate |
| Official length | Medium |
| Description | After the attack on the Myreque by Vanstrom Klause and with the deaths of both Sani and Harold, Veliaf is counting on you to help. Now that the Myreque freedom fighters' base camp has been revealed, they'll need to move on and set up base somewhere else. Veliaf has heard of a little known village south of Mort'ton, referred to as 'Burgh de Rott'. This could be just the place to set up operations to strike back against the evil of Lowerniel Vergidiyad Drakan and his Vampyric overlordship in Morytania. And who knows what other secrets about Morytania and its dark past will be revealed? |
| Requirements | |
| Items required |
|
| Recommended |
|
| Enemies to defeat |
|
| Ironman concerns |
|
| League notes | Unlocking |
Walkthrough
Starting the quest

Start the quest by speaking to Veliaf Hurtz in the secret cave of the Myreque.
- To get to the secret cave, travel to the Canifis town centre. Or use Fairy ring DLS
- Enter the trapdoor south of the Hair of the Dog tavern.
- Search the wall south of the ladder and walk through the secret passage.
- Follow the tunnel slightly south until you come across an east branch of the tunnel.
- Enter the Cave entrance
Veliaf will tell the player to travel to Burgh de Rott to establish a new base of operations for the Myreque.
Preparing to travel to Burgh de Rott
Burgh de Rott does not have a functional bank at the beginning of this quest; Canifis is the closest available bank. You will repair Burgh de Rott's bank, general store, and bar throughout the course of the quest.
Before you travel, you should make sure that you have what you need to complete the next part of the quest.
You will be attacked by aggressive shades when in Mort'ton if you are under level 81 combat.
5 buckets are optimal in order to minimise the number of trips to and from the pub's basement, but you can use one bucket if inventory space is a priority. Buckets spawn just west of the well in Burgh de Rott.
You have several options of travelling from Canifis to Burgh de Rott. You could teleport to the Shades of Mort'ton minigame if you have completed Shades of Mort'ton. You could use the boat shortcut you first used in the previous quest. You can teleport to fairy ring BKR to be closer to this boat. If you have at least 50 Agility, you could use the fairy ring BIP, which bypasses the swamp and avoids nearly all of the ghasts. Alternatively, you could run through the swamp again. You can also use a Mort'ton teleport scroll, Barrows teleport tablet, or cast the Barrows Teleport spell (keep in mind you will need the normal spell book).
To return to Canifis from Burgh de Rott, you could use the fairy ring CKS, a slayer ring, the Kharyrll Teleport or Salve Graveyard Teleport (remember to switch back to the standard spellbook afterward), an ectophial, or the boat shortcut.
Arrival at Burgh de Rott

When you arrive in Mort'ton (the town north of Burgh de Rott), head south to find angry residents at the gate. Before being able to enter, talk to Florin from the outside of the gate and then use your food item on the open chest directly in front of the gate. Florin will then let you into the town. Shades will no longer attack you.

Once inside, talk to Florin again regarding 'out of the way' places to learn the cellar of the inn might be suitable but it is covered in rubble.
Clearing out the rubble from the bar basement
Go to the pub just south-east of the gate, climb over the broken wall, and mine the rubble by using your pickaxe on it. If you forgot to bring a bucket, there is a bucket spawn near the well south of the front gate. You can world hop to pick up additional buckets quickly, 5 buckets will make this faster. When you have at least one bucket, climb down the trapdoor.
In the basement of the pub mine each pile of rubble, and then use a spade on the remaining debris to fill buckets of rubble. Each bucket can contain 3 loads worth of rubble.

Every few rubble piles you mine, you will get 8 items: nails (10 bronze, 5 iron, 3 steel, 2 black, 1 mithril), 1 rock, 1 broken glass, dusty scroll, and plaster fragment. If you do not have space, they will drop to the floor, while the dusty scroll and plaster fragment will be discarded into the buckets of rubble. You can read the scroll and fragment, but they are not needed to complete this quest. The rest of the items are not required for the quest, unless you do not have the required nails.
When the buckets are filled, climb the ladder and use them on the rubble pile just south-west outside the bar to empty them. The dusty scroll and plaster fragment can be reobtained by searching the rubble pile. Trying to use the buckets' "Empty" option will simply give you a message that you cannot dump it anywhere.
If you drop items to make room for the junk, they will disappear if you exit the basement. If you only mine the rocks to rubble and exit the area, the rubble will be restored to rocks and you will have to mine them again.
After you are finished mining all of the rubble, there will be a cutscene of you noticing a plaque on the wall. The plaque holds no significance for this quest. If the cutscene doesnt play, you need to return to the cellar and clear more rubble that magically appears.
Go and talk to Razvan (who is typically located just north of the bar), and he will tell you to patch up the town a bit.
Repairing the general store


Talk to Aurel in the general store in the north-eastern part of the city, and he will tell you that you need to repair the roof and the walls of the shop. Head up the ladder on the outside of the southern wall of the General Store and use 3 planks and 12 nails in the hole in the roof to repair it. After that, head down and use 3 planks and 12 nails on the damaged wall just east of the ladder.
Then, talk to Aurel again - he will want the store stocked before he can open it. You will be given a crate to fill up with these items. (Tip: You can change the second requirement in the request by walking away during the dialogue where Aurel tells you what he needs, but before he hands you the crate. Receiving the crate finalizes the requirements and cannot be changed afterward.)
He requires the following:
- 10 bronze axes
- 10 raw mackerel or 10 raw Snail meats (depending on what is asked)
- 3 tinderboxes
You will now need to visit a bank. Fill the crate with the items required.
While you are at the bank pick up these items for the next part of the quest:
- 5 planks,
- a hammer
- 2 swamp paste
- 20 nails
The snail meat can be acquired by killing snails throughout the Mort Myre Swamp, or purchased on the Grand Exchange. Any type works. If you brought a big fishing net, there are some big net spots south of the Burgh de Rott bank that can be used to obtain the mackerel.
Deposit your crate to Aurel in Burgh de Rott. Talk to him again, and he will ask that you repair the bank to the south of the city.
Repairing the bank


Repair the bank booth by inspecting the bank booth, and then the wall on the west side of the bank as you did before.
Then, ask Cornelius what to do, and in the same conversation, ask him: Do you fancy the job?.
You will now be able to use the bank.
Repairing the furnace

Talk to Cornelius again, he will ask that you fix the furnace. It can be found in the south-east corner of Burgh de Rott. Take two steel bars, a tinderbox, a hammer and one coal and repair the furnace to the south-east side of the city. Bring your silver weapon or Efaritay's aid along with you. Inspect the broken furnace to repair it. Put the coal inside of the newly fixed furnace, and light it with the tinderbox. You will then see a cutscene.


After the cutscene, you will need to prepare for a fight with your silver weapon or any weapon wearing Efaritay's aid. Go to the general store, and talk to Gadderanks and then Wiskit. Talk to one of the Vampyre Juvinates and Gadderanks will try to kill you.
Kill Gadderanks (he's level 35 and the fight is fairly easy), and then kill the Vampyre juvinates (level 50 and 54) with your silver weapon or any weapon with Efaritay's aid. During the fight, Veliaf will come and assist you by taking on one of the vampyres. (These enemies can all be safespotted from behind the store counter with a ranged weapon as long as Efaritay's aid is on) There is a bug where sometimes, one of the juvinates will not turn into mist and will instead become invincible. If this happens, leave the general store and try again. Switching to a non silver weapon for a few hits may also work.
Talk to Gadderanks again, and he will tell you of the vampyre's weaknesses and then die. You will get his hammer, which is similar to a Granite maul but stronger against shades. (If your inventory has no room for the hammer, you can speak to Aurel to receive it later.)
Talk to Veliaf, and he will tell you to meet him back at his hideout in the Hollows.
Transporting Ivan
It is strongly recommended to bring a steel chainbody, steel platelegs, steel med helm, and a silver sickle in order to arm Ivan for the fight, other gear will not work. Ivan will also accept up to 15 cooked snails, cooked salmon, cooked slimy eel or stew. You will not get back any items you give to Ivan.
It is also recommended to bring runes for one attack spell (if using melee) in order to lure the first vampyre to you.
Remember to bank any pets before beginning this part of the journey, as Ivan will stop you from taking any followers with you.

Return to Veliaf in the Myreque Hideout and talk to him. He will ask you talk to Radigad and Polmafi to have them head to the Burgh de Rott hideout, but wants you to escort Ivan Strom to the Paterdomus Temple because the mission is becoming too dangerous for the young, aspiring priest.
Talk to Radigad Ponfit and Polmafi Ferdygris. If you brought items for Ivan, right-click and "use" the items on him. Speak to Ivan when you're ready to escort him through the swamp.
You get to choose between two routes through Mort Myre Swamp. You will be attacked on both the 'long' and the 'short' routes. If you choose the long route, you have to fight four level 50 Vampyre Juvinates. If you choose the short route, you'll be attacked by two that are level 75. The 'short' route is probably easier than the 'long' route because it's easier to defend Ivan, despite the fact that you have a harder fight. If you can, try and get Ivan behind you so he can't be attacked by the juvinates. If you chose the 'short' route, you can sometimes intercept the vampyre that is meant to attack Ivan. This can buy you significant time. Simply attack the vampyre that beelines to Ivan when the instance starts to occupy him.
When you first enter the fight area, don't move. If you chose to bring runes, cast any attack spell on the first vampyre and kill it. Remember to use your silver weapon OR equip Efaritay's aid to fight the vampyres! Efaritay's aid caps damage at 10, so a fast hitting weapon such as Darts are ideal.
The second vampyre will always attack Ivan at the same point, so just hope that Ivan survives until you finish off the first one. It is possible to finish this part without giving Ivan anything, but it is difficult, and it will often require several attempts just to keep Ivan alive. Therefore, it is highly recommended to give Ivan armour and food. It should also be noted that Ivan does not receive protection from the player's Protect from Melee prayer. If Ivan becomes trapped by the vampyres, you can talk to him then move your character in order to have Ivan follow you one square allowing you to block the vampyre from attacking Ivan.
If Ivan's health becomes too low (or after he runs out of food), he will teleport out. At this point, you might as well leave the area because killing the remaining vampyres will not let you progress. When you leave, you will reappear somewhere around Canifis, so make your way back to where you spoke to Ivan to try again (make sure to collect food via the bank on your way back to him as he will need more). Once you defeat the vampyres, you will complete the trek and appear outside the Temple of the Salve.
*There is a bug where it is possible to complete the trek without completing the instance. Just continue the quest as normal.
If you take the short route with 2 level 75 Vampyre Juvinates, you can keep Ivan safe by walking west once the fight starts into a spot with 3 seaweeds surrounding it, and then keep walking back and forth to the east and west until Ivan decides to go into that spot. Wait for the Vampyre Juvinates to get close to you before attacking. This way, you can protect Ivan without giving him any supplies.
Completing the long route is possible at a low combat level by supplying Ivan with a full inventory of food and helping him tank the Vampyres.
After successfully escorting Ivan, talk to Drezel (inside the temple) at the River Salve, and get the key to the library from him (using chat option 1, 1, 2, 3, 4, 3). Mention that the lives of Morytania rest on his decision.
Search the keyhole on the east side of the room Drezel is in. Use your key on the keyhole. Go down the trapdoor into the library, and search the middle bookcase facing the western wall; you will pick up a book titled inside The Sleeping Seven. When you hover over this in your inventory it is called "The sleeping seven". Read the book.
The rod of Ivandis
Items recommended: Ectophial, Amulet of glory, Dramen Staff, or Mort'ton teleport
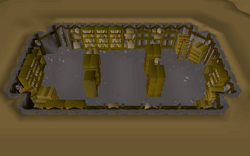

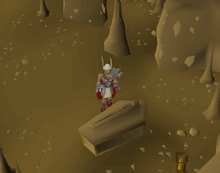
Go back to Canifis, and enter the trapdoor behind the pub. Search the south wall. Now, directly to your east you should see two wooden boards forming an 'X' which are covering an entrance - use a hammer on the boards to get through and you should see a tomb that looks like a coffin. If nothing interesting happens, you must read "The sleeping seven".
Use some soft clay on the top of the tomb to get a rod mould.
Go to a furnace, and use a silver bar, mithril bar, and cut sapphire to make a Silvthrill rod and enchant it using Lvl-1 Enchant. There are several convenient furnaces:
- Use an Amulet of glory to access the Edgeville furnace, return using the fairy ring west of the Grand Exchange (to fairy ring DKR) by using CKS.
- use a fairy ring to get to the Zanaris furnace, returning to fairy ring CKS.
- Minigames Teleport to TzHaar Fight Pit, use the lava forge furnace, and then leave via the fairy ring slightly south (to fairy ring CKS).
- The one available in Port Phasmatys after Ghosts Ahoy; using an Ectophial.
- The Burgh de Rott furnace you fixed earlier.
Take the enchanted Silvthrill rod and a rope back to the basement of Paterdomus Temple, use the rod with the well (in the room next to Drezel) with the rope in your inventory to create the Rod of ivandis(10).
Take the Rod of ivandis to Burgh de Rott, go into the cellar of the pub, and give it to Veliaf to complete the quest.
Congratulations, quest complete!
Rewards
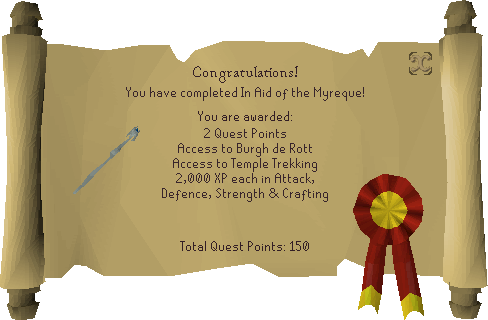
- 2
 Quest points
  2,000 Attack experience
 2,000 Strength experience
 2,000 Crafting experience
 2,000 Defence experience
- Access to Burgh de Rott
- Access to the Temple Trekking minigame
- A Gadderhammer from defeating Gadderanks
- The ability to make the Rod of Ivandis
- Completing this quest awards the player with 5 Kudos which can be claimed by talking to Historian Minas in the Varrock Museum.
Required for completing
Completion of In Aid of the Myreque is required for the following:
Transcript
| Characters |
| ||||||
|---|---|---|---|---|---|---|---|
| Items |
| ||||||
| Locations | |||||||
| Music | |||||||
| Related | |||||||

