Tombs of Amascut

| Tombs of Amascut | |||||||||||||||||||
|---|---|---|---|---|---|---|---|---|---|---|---|---|---|---|---|---|---|---|---|
 | |||||||||||||||||||
| Released | 24 August 2022 (Update) | ||||||||||||||||||
| Also called | Raids 3, ToA | ||||||||||||||||||
| Type | Raid | ||||||||||||||||||
| Members | Yes | ||||||||||||||||||
| Location | Jaltevas Pyramid | ||||||||||||||||||
| League region | |||||||||||||||||||
| Participants | 1-8 | ||||||||||||||||||
| Skills | Combat, Mining | ||||||||||||||||||
| Music | See below | ||||||||||||||||||
| Map | |||||||||||||||||||
| <mapframe align="center" frameless="" plane="0" width="300" y="2725" x="3345" height="300" zoom="2" mapID="0">
[] </mapframe> | |||||||||||||||||||
The Tombs of Amascut is a raid set in the Kharidian Desert, within the Jaltevas Pyramid at the necropolis. To participate in the raid, players will have to complete the Beneath Cursed Sands quest.
Despite the name of the raid, the tomb is in actuality that of the Pharaoh Osmumten, where players must help him drive Amascut away from his tomb by freeing the lesser gods of the Menaphite Pantheon from her control and stopping her from acquiring the divine weapons found within that would allow her to ascend to godhood.
Up to eight players may attempt the raid.
Getting there
The quickest methods of reaching the necropolis are as follows:
- Teleporting to Jaltevas via the Pharaoh's sceptre. This method requires having used the sceptre on the obelisk north of the necropolis mine.
- Teleporting via fairy ring code AKP. This method requires level 62 Agility.
Slower methods:
- Using the magic carpet from Shantay Pass to Pollnivneach, another carpet from the south side of Pollnivneach to Sophanem, and then walk south-east. This costs 400 coins without Rogue Trader and 200 coins with the Rogue Trader miniquest.
- You can use the Construction cape or Pollnivneach teleport to teleport to Pollnivneach and then run south to the carpet to Sophanem.
- Teleport to Nardah and run south-west.
Lobby
The lobby features a mass system as well as a bank.
Official worlds
The following official worlds are assigned to the Tombs of Amascut:
| World | Location | Members | Activity |
|---|---|---|---|
| 329 | Tombs of Amascut | ||
| 331 | Tombs of Amascut | ||
| 333 | Tombs of Amascut | ||
| 531 | Tombs of Amascut |
Mechanics
The Tombs of Amascut can be completed in a group of 1-8 players. In group encounters, the 2nd-3rd member will add 90% of the base health of bosses each, while the 4th and beyond will add 60% each.
It is not possible to cast standard spellbook utility spells inside the raid (with the exception of Telekinetic Grab), although utility spells from the Lunar spellbook do work.
Bosses
The Tombs of Amascut comprise four paths, each one themed after one of Tumeken's avatars: Apmeken, Crondis, Het, and Scabaras. Each path consists of a challenge section followed by a boss. These can be taken on in any order the player(s) choose to do so. If path leveling is active, the order in which the bosses are killed may matter; otherwise, there is not much of a difference.
Once all four paths are completed, the lower level where the final boss fight takes place becomes accessible, which consists of two twin bosses. After they are defeated, players can claim their rewards.
-
 Akkha, the Guardian of Het.
 -
 Ba-Ba, the Guardian of Apmeken.
 -
 Kephri, the Guardian of Scabaras.
 -
 Zebak, the Guardian of Crondis.
 -
 Elidinis' Warden, part 1 of the final boss.
 -
 Tumeken's Warden, part 2 of the final boss.


Invocations and Raid Level
| Mode | ||
|---|---|---|
| Entry Mode | 0–149 | |
| Normal Mode | 150–299 | |
| Expert Mode | 300–600 | |

The Tombs of Amascut makes use of the invocation system, which allows players to customise the difficulty of the raid by choosing to enable various invocations, setting a Raid Level which adjusts the stats of NPCs within the raid; for every 5 raid levels, an NPC's hitpoints, defence, accuracy, and damage are increased by 2% additively, with damage capping out at +150%. For example, a raid level of 100 will modify these stats for all enemies within the raid by +40%, whereas a raid level of 500 will modify enemy hitpoints, defence, and accuracy by +200%, and damage by +150%.
Apart from making the raid harder, a higher raid level increases the player's overall drops and the chances for unique items to be rolled, which are shown in the raid party's invocation tab within the raid party interface, accessed via the Grouping Obelisk where players can form raid parties.
| Invocation | Details | Raid lvl modifier | Category | |
|---|---|---|---|---|
| Try Again | Players have ten attempts to complete a raid.
An attempt is failed if the team wipes during a challenge, but if the team wipes just as the challenge is completed, it will not count as a fail. Only one invocation in the Attempts category can be active. |
+5 | Attempts | |
| Persistence | Players have five attempts to complete a raid. | +10 | Attempts | |
| Softcore Run | Players have three attempts to complete a raid. | +15 | Attempts | |
| Hardcore Run | Players have one attempt to complete a raid. | +25 | Attempts | |
| Walk for It | Players have 40 minutes to complete the raid, including time spent between each Path.
If unsuccessful, the raid level will decrease by 20. (The timer begins upon entering the first Path and ends when the Warden reaches 0 health in the final phase of the fight.) Only one invocation in the Time Limit category can be active. |
+10 | Time Limit | |
| Jog for It | Players have 35 minutes to complete the raid.
If unsuccessful, the raid level will decrease by 30. |
+15 | Time Limit | |
| Run for It | Players have 30 minutes to complete the raid.
If unsuccessful, the raid level will decrease by 40. |
+20 | Time Limit | |
| Sprint for It | Players have 25 minutes to complete the raid.
If unsuccessful, the raid level will decrease by 50. |
+25 | Time Limit | |
| Need Some Help? | The quantity of items offered by the Helpful Spirit will be reduced to 66%, with a minimum of one supply of that type.
Despite the name, the reduction may or may not occur - e.g it's still possible to get an unaffected Power option (2 salt + 1 adrenaline) but has a chance of being reduced (1 salt + adrenaline) Only one invocation in the Helpful Spirit category can be active. |
+15 | Helpful Spirit | |
| Need Less Help? | The quantity of items offered by the Helpful Spirit will be reduced to 33%, with a minimum of one supply of that type. | +25 | Helpful Spirit | |
| No Help Needed | The quantity of items offered by the helpful spirit will be reduced to 10%, with a minimum of one supply of that type. | +40 | Helpful Spirit | |
| Walk the Path | Completing a path during the raid can cause other paths to level up. Four level ups are given per raid, although the path they are given to are random.[1] Completing the first path randomly adds levels to two other paths; the second adds a level to one of the other two paths, and then the third path adds another level to the final path.
The first path level will modify most enemy hitpoints and damage by +8%, with every additional level modifying these stats by +5%, up to six levels. Furthermore, every two path levels changes each path's boss mechanics, capping at four path levels:
When an uncompleted path is leveled up, a message will appear in the game box stating You hear a mysterious rumbling coming from the Path of [Menaphite Pantheon god]. |
+50 | Paths | |
| Pathseeker | All paths will level up once upon entering the raid.
Only one invocation in the Path Level category can be active. |
+15 | Path Level | |
| Pathfinder | All paths will level up twice upon entering the raid. | +40 | Path Level | |
| Pathmaster | All paths will level up three times upon entering the raid. | +50 | Path Level | |
| Quiet Prayers | Protection prayers will be 10% less effective within the raid. | +20 | Prayer | |
| Deadly Prayers | Prayer is drained by 20% of damage taken. | +20 | Prayer | |
| On a Diet | Players can no longer eat food within the raid, though potions that restore health (such as Saradomin brews) can still be used.
Players will also no longer be offered silk dressings and honey locusts should this invocation be active. |
+15 | Restoration | |
| Dehydration | Players can no longer drink potions that restore health. | +30 | Restoration | |
| Overly Draining | All special attacks use 100% special attack energy.
Drinking liquid adrenaline will temporarily reduce the cost to 50%. |
+15 | Restoration | |
| Lively Larvae | The number of dark brown eggs launched during Kephri's Mass Incubation attack will increase from 2 to 4. | +5 | Kephri | |
| More Overlords | An additional scarab is summoned during Kephri's shield healing phases. The first summons a Soldier Scarab, while the second summons a Spitting Scarab. | +15 | Kephri | |
| Blowing Mud | The number of players targeted by Kephri's Dung Strike attack is increased to two.
This invocation has no effect in solo encounters. |
+10 | Kephri | |
| Medic! | Kephri will summon scarab swarms outside her shield healing phases. These swarms move 50% slower. | +15 | Kephri | |
| Aerial Assault | Kephri's auto-attack will do more damage, and its attack range will increase from a single tile to a 3x3 area.
This invocation also applies to the Bomber Scarabs that appear during the shield healing phase and Kephri's Phantom during the third phase of the fight with Elidinis' Warden. |
+10 | Kephri | |
| Not Just a Head |
|
+15 | Zebak | |
| Arterial Spray | Zebak's blood magic will have increased range and healing.
Not Just a Head must be active in order to activate this invocation. |
+10 | Zebak | |
| Blood Thinners | Three Blood Clouds are summoned instead of one.
Not Just a Head must be active in order to activate this invocation. |
+5 | Zebak | |
| Upset Stomach | Zebak's acid pools will have their spread increased from 3x3 to 5x5 and the jugs will have their water reduced from 5x5 to 3x3. | +15 | Zebak | |
| Double Trouble | Akkha will perform two special attacks at once. | +20 | Akkha | |
| Keep Back | Akkha will use melee alongside his ranged and magic attacks, which lands just before the projectile attack with no animation. | +10 | Akkha | |
| Stay Vigilant | Akkha will randomly swap between attack styles and protection prayers rather than at set intervals.
This invocation also applies to Akkha's Phantom during the third phase of the fight with Elidinis' Warden. |
+15 | Akkha | |
| Feeling Special? |
|
+20 | Akkha | |
| Mind the Gap! | When Ba-Ba knocks back the player to the bottom of the room at 66% and 33% health, players will fall into the pit and die, unless they stand at the northern/southern sides of the room. | +10 | Ba-Ba | |
| Gotta Have Faith | Energy blasts from open sarcophagi in Ba-Ba's room will deal additional damage based on the player's remaining prayer points. | +10 | Ba-Ba | |
| Jungle Japes | Ba-Ba's baboons will drop a banana peel on the floor on death. If stepped on, players take a small amount of damage and are stunned for 3 seconds. | +5 | Ba-Ba | |
| Shaking Things Up | The shockwave from Ba-Ba's slam attack will damage from a 3x3 (+1 tile to the north/west/east/south) to 5x5 (+1 tile to the north/west/east/south). | +10 | Ba-Ba | |
| Boulderdash | Ba-Ba's rolling boulders spawn twice as fast. | +10 | Ba-Ba | |
| Ancient Haste | During the first phase of the Wardens' fight, the Wardens will charge at a faster rate. | +10 | The Wardens | |
| Acceleration | During the second phase of the Wardens' fight, the Warden attacks faster while the obelisk charges faster. | +10 | The Wardens | |
| Penetration | During the second phase of the Wardens' fight, the obelisk will deal more damage to successful attacks and also temporarily disable overhead prayers. | +10 | The Wardens | |
| Overclocked | During the final phase of the Wardens' fight, the slam attack is performed 1 tick faster. | +10 | The Wardens | |
| Overclocked 2 | During the final phase of the Wardens' fight, the slam attack is performed 2 ticks faster.
Overclocked must be active in order to activate this invocation. |
+10 | The Wardens | |
| Insanity | During the final phase of the Wardens' fight, the following are applied:
Overclocked 2 must be active in order to activate this invocation. |
+50 | The Wardens | |
| Blazing Tombs I | An extra challenge for those most in tune with their League relics. Requires at least Raid level 300.
Increases Raid level by 200. |
+200 | Trailblazer Reloaded League | |
| Blazing Tombs II | An extra challenge for those most in tune with their League relics. Requires at least Raid level 300.
Increases Raid level by 200. |
+200 | Trailblazer Reloaded League | |
Consumables
Consumable items are received from supplies given by the Helpful Spirit in the Nexus of the Tombs of Amascut. They can be claimed from the spirit once after completing two paths, and once again after completing the remaining two paths and before proceeding to the final encounter.
The amount of supplies offered varies based on the raid's active invocations: "Need Some Help?", "Need Less Help?", and "No Help Needed" reduce the given supplies down to 66%, 33%, and 10% respectively. There will always be a minimum of one supply of that type regardless of reduction percentage.
| Item | Effect | |
|---|---|---|
| Honey locust | Stacks in the inventory. Heals 20 Hitpoints (can overheal), and restores prayer points equal to a dose of prayer potion. Automatically given during wipes, unless the "On a Diet" invocation is enabled. | |
| Ambrosia | Has 2 doses. Fully restores hitpoints, prayer points and run energy, and acts as a dose of antidote++. Can not be consumed if the "Dehydration" invocation is enabled.
| |
| Blessed crystal scarab | Has 2 uses. Restores 8 Prayer points every 4 ticks (2.4 seconds), 9 times.
This yields a total restoration of 72 Prayer points over the course of 40 ticks (24 seconds). | |
| Liquid adrenaline | Has 2 doses. Halves special attack costs for the next 150 seconds. | |
| Nectar | Has 4 doses. Heals Hitpoints (can overheal), and drains Attack, Strength, Defence, Ranged, and Magic. Can not be consumed if the "Dehydration" invocation is enabled.
| |
| Silk dressing | Has 2 uses. Heals 5 hitpoints every 5 ticks (3 seconds), 20 times.
This yields a total restoration of 100 hitpoints over the course of 100 ticks (60 seconds). Not provided if the "On a Diet" invocation is enabled. | |
| Smelling salts | Has 2 uses. Restores run energy by 25% and boosts Attack, Strength, Defence, Ranged, and Magic by .
The combat boost is refreshed every 15 seconds for 8 minutes. | |
| Tears of elidinis | Has 4 doses. Restores combat stats and prayer points, and affects party members in a 3x3 area.
| |


Death within the Tombs
By default, players may die any number of times if the team does not have a limited attempt invocation enabled. If one of these invocations are enabled, however, then an attempt is counted once the entire team dies during a challenge. Additionally, the team will have to restart the room they have all died in, with previous progress being saved and being given honey locusts should the "On a Diet" invocation be inactive.
If the entire team is killed and there are no more limited attempts left, players will lose all unprotected items, which can later be reclaimed from a storage where the reclaim fee is based on the items' respective Grand Exchange values, up to a maximum fee of 500,000 coins.
If players die a second time without reclaiming the items from the storage, they will be permanently lost, unless the death occurs within a minigame deemed safe, such as Pest Control.
Dying in the Tombs of Amascut is a dangerous death - Hardcore Ironmen who die within the tomb will lose their Hardcore status.
A disconnect or logout while not inside a safe area such as the nexus of the tomb will count as a death inside the tombs.
A failure to reconnect to a party after a disconnect from an unsafe area (e.g. due to logging in on the wrong world) will always result in a dangerous death for Hardcore Ironmen, and all items stored inside an item retrieval service (deathbank) will be lost if death invocations are enabled.
Money making
Lua error in Module:Mmgsection at line 44: attempt to index local 'smwData' (a nil value).
Rewards

Upon defeating the Wardens, the party will be able to access the treasure room and receive their reward for helping Osmumten defeat Amascut's thralls.
Like the Theatre of Blood, if a unique drop is rolled at the end of the raid, Osmumten's sarcophagus will glow purple instead of white with the designated player being able to open it instead of the chests by the side. When the sarcophagus is opened, an animation plays which reveals the item. Only one unique can be obtained per raid, if any at all. If no unique item is rolled, then the chest will contain three rolls from the common drop table. The unique drops that players can obtain from the sarcophagus include:
- Pieces of the Masori armour:
 Lightbearer
 Osmumten's fang
 Elidinis' ward
 Tumeken's shadow
Additionally, there are tertiary items which can be rolled alongside any reward. The unique tertiary rewards from the Tombs of Amascut include
 Thread of elidinis, can be used to create the divine rune pouch
- Jewels with the ability to enhance the keris partisan:
- And the pet from the raid,
 Tumeken's guardian
If the player finished the raid with fewer than 1,500 points, they will instead receive fossilised dung.
If the player leaves the room after opening the chest, rewards can be found through the rewards niche in the south-east corner of the lobby room. If the player re-enters the raid without claiming their rewards from the rewards niche, they will be lost; the player will be warned of this prior to entering another raid.
Players can find six books during the raid.
| Book | Obtained via |
|---|---|
| Dropped by Ba-Ba. | |
| Dropped by Zebak. | |
| Dropped by Akkha. | |
| Dropped by Kephri. | |
| Dropped by either Tumeken's Warden or Elidinis' Warden depending on which is killed last. | |
| Found by searching the bags in Osmumten's burial chamber. |
Icthlarin's shroud
Players can earn Icthlarin's shrouds through repeated completions of the Tombs of Amascut, claimed from a chest in the lobby.
| Accolade | Earned at |
|---|---|
| 100 completions of Normal/Expert mode | |
| 500 completions of Normal/Expert mode | |
| 1000 completions of Normal/Expert mode | |
| 1500 completions of Normal/Expert mode | |
| 2000 completions of Normal/Expert mode |
Raid Summary

At the end of a raid, players can review their performance in the raid by reading the scoreboard on the eastern side of the burial chamber, where they can view a summary of the raid, including details such as total damage dealt and received, number of deaths, and an honorary title.
The list of possible titles given in the Raid Summary interface are as follows:
| Title | Description |
|---|---|
| The Leech | Earn the least amount of contribution points in at least five rooms. |
| The Swimmer | Spent at least 30 seconds in Zebak's pool. |
| The Specialist | Used the most special attack energy. |
| The Picky Eater | Used the least food. |
| The Peasant | Finished the raid with the lowest value loadout. |
| The Showoff | Finished the raid with the highest value loadout. |
| The Tank | Took the most damage. |
| The Baller | Dropped more than 20 orbs during the Akkha fight. |
| The Entomophobe | Killed the most scarabs. |
| The Moth | Died to a light beam in Het's path. |
| The Carry | Had the highest overall damage. |
| The Anchor | Died the most. |
| The Glutton | Ate the most food. |
| The Sorcerer | Dealt the most magic damage. |
| The Archer | Dealt the most ranged damage. |
| The Brawler | Dealt the most melee damage. |
| The Clutch | Finished off the Wardens on their own. |
Combat Achievements
Entry Mode
There are 0 Combat Achievement tasks (totalling 0 points) available for the Tombs of Amascut: Entry Mode.
| Name | Description | Type | Tier | Comp% |
|---|
Normal Mode
There are 0 Combat Achievement tasks (totalling 0 points) available for the Tombs of Amascut.
| Name | Description | Type | Tier | Comp% |
|---|
Expert Mode
Despite some of the task descriptions omitting "(Expert mode)", all of the following tasks must be completed in Expert Mode in order to complete it; do not be deceived by the lack of clarity and failure notices which you might get while raiding in normal mode.
Additionally, you must end the raid with at least 300 raid level. For example, even though it is possible to get an Expert mode kill count with 250 raid level at the end (due to failing the 25 minute time invocation), you will be ineligible for completing Expert Mode Combat Achievements.
There are 0 Combat Achievement tasks (totalling 0 points) available for the Tombs of Amascut: Expert Mode.
| Name | Description | Type | Tier | Comp% |
|---|
Music unlocked
| Challenge complete | |
|
The jingle that plays upon completing a challenge room.
| |
| File:Tombs of Amascut - Path challenge complete.ogg | |
| Boss defeated | |
|
The jingle that plays once a boss has been defeated.
| |
| File:Tombs of Amascut - boss defeated.ogg | |
| Name | Unlock details | Music track |
|---|---|---|
| Into the Tombs | Unlocks in the raid lobby | File:Into the Tombs.ogg |
| Beneath Cursed Sands | Unlocks in the tomb's Nexus | File:Beneath Cursed Sands.ogg |
| Test of Strength | Unlocks in the Path of Het | File:Test of Strength.ogg |
| Sands of Time | Unlocks during the fight with Akkha | File:Sands of Time.ogg |
| Test of Companionship | Unlocks in the Path of Apmeken | File:Test of Companionship.ogg |
| Ape-ex Predator | Unlocks during the fight with Ba-Ba | File:Ape-ex Predator.ogg |
| Test of Isolation | Unlocks in the Path of Scabaras | File:Test of Isolation.ogg |
| A Mother's Curse | Unlocks during the fight with Kephri | File:A Mother's Curse.ogg |
| Test of Resourcefulness | Unlocks in the Path of Crondis | File:Test of Resourcefulness.ogg |
| Jaws of Gluttony | Unlocks during the fight with Zebak | File:Jaws of Gluttony.ogg |
| Amascut's Promise | Unlocks during the fight with the Wardens | File:Amascut's Promise.ogg |
| Laid to Rest | Unlocks upon entering the burial chamber | File:Laid to Rest.ogg |
Changes
| Date | Changes |
|---|---|
| [[{{#explode:4 September 2024| |0}} {{#explode:4 September 2024| |1}}]] [[{{#explode:4 September 2024| |2}}]] (update) |
Players are no longer able to gain experience by using magic spells on the obelisks within the Path of Scarabas. |
| [[{{#explode:29 May 2024| |0}} {{#explode:29 May 2024| |1}}]] [[{{#explode:29 May 2024| |2}}]] (update) |
|
| [[{{#explode:30 August 2023| |0}} {{#explode:30 August 2023| |1}}]] [[{{#explode:30 August 2023| |2}}]] |
Hotfix
The Volatile Baboon's explosion attack will no longer kill pets.[2][3] |
| [[{{#explode:30 August 2023| |0}} {{#explode:30 August 2023| |1}}]] [[{{#explode:30 August 2023| |2}}]] (update | poll) |
|
| [[{{#explode:5 April 2023| |0}} {{#explode:5 April 2023| |1}}]] [[{{#explode:5 April 2023| |2}}]] (update) |
A bug was fixed in the Tombs of Amascut where freezing a Warden just as it was waking up would remove it from existence. |
| [[{{#explode:22 March 2023| |0}} {{#explode:22 March 2023| |1}}]] [[{{#explode:22 March 2023| |2}}]] (update) |
Party leaders in the Tombs of Amascut can now promote other members of the party while the group is forming in the lobby. |
| [[{{#explode:13 December 2022| |0}} {{#explode:13 December 2022| |1}}]] [[{{#explode:13 December 2022| |2}}]] (update) |
Mapping issues within 'purgatory' of the Crondis room have been corrected. |
| [[{{#explode:30 November 2022| |0}} {{#explode:30 November 2022| |1}}]] [[{{#explode:30 November 2022| |2}}]] (update) |
Combat Achievements were added for the raid. |
| [[{{#explode:19 October 2022| |0}} {{#explode:19 October 2022| |1}}]] [[{{#explode:19 October 2022| |2}}]] (update) |
|
| [[{{#explode:11 October 2022| |0}} {{#explode:11 October 2022| |1}}]] [[{{#explode:11 October 2022| |2}}]] (update) |
|
| [[{{#explode:5 October 2022| |0}} {{#explode:5 October 2022| |1}}]] [[{{#explode:5 October 2022| |2}}]] (update) |
|
| [[{{#explode:29 September 2022| |0}} {{#explode:29 September 2022| |1}}]] [[{{#explode:29 September 2022| |2}}]] |
Hotfix
|
| [[{{#explode:28 September 2022| |0}} {{#explode:28 September 2022| |1}}]] [[{{#explode:28 September 2022| |2}}]] (update) |
|
| [[{{#explode:21 September 2022| |0}} {{#explode:21 September 2022| |1}}]] [[{{#explode:21 September 2022| |2}}]] (update) |
|
| [[{{#explode:14 September 2022| |0}} {{#explode:14 September 2022| |1}}]] [[{{#explode:14 September 2022| |2}}]] (update) |
|
| [[{{#explode:8 September 2022| |0}} {{#explode:8 September 2022| |1}}]] [[{{#explode:8 September 2022| |2}}]] (update) |
|
| [[{{#explode:2 September 2022| |0}} {{#explode:2 September 2022| |1}}]] [[{{#explode:2 September 2022| |2}}]] (update) |
Hotfix
|
| [[{{#explode:1 September 2022| |0}} {{#explode:1 September 2022| |1}}]] [[{{#explode:1 September 2022| |2}}]] (update) |
|
| [[{{#explode:26 August 2022| |0}} {{#explode:26 August 2022| |1}}]] [[{{#explode:26 August 2022| |2}}]] |
Hotfix
|
| [[{{#explode:25 August 2022| |0}} {{#explode:25 August 2022| |1}}]] [[{{#explode:25 August 2022| |2}}]] |
Hotfix
|
| [[{{#explode:24 August 2022| |0}} {{#explode:24 August 2022| |1}}]] [[{{#explode:24 August 2022| |2}}]] |
Hotfix
|
Gallery
-
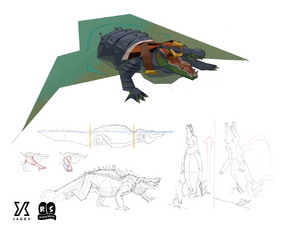
 Sketches and references for the Tombs of Amascut, by Mod Grub.
 -
 Timelapse of creating the raid's logo, by Kate Blacklock.
 -
 Concept art of raid wall kits, by Mod Grub.
 -
 Concept art of organic objects, by Mod Grub.
 -
 Concept art of various objects within the raid, by Mod Grub.
 -
Concept art of outside the pyramid, by Mod Grub.
-
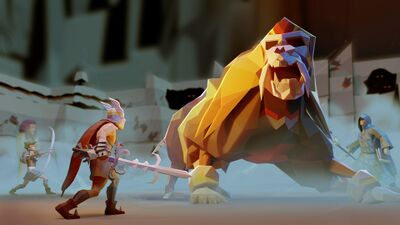 Official artwork of the Ba-Ba encounter.
.png)


Rooms
-
 Concept art of the lobby room, by Mod Jerv.
 -
 Concept art of the Path of Het, by Mod Jerv.
 -
 Concept art of Akkha's room, by Mod Jerv.
 -
 Concept art of the Path of Apmeken, by Mod Grub.
 -
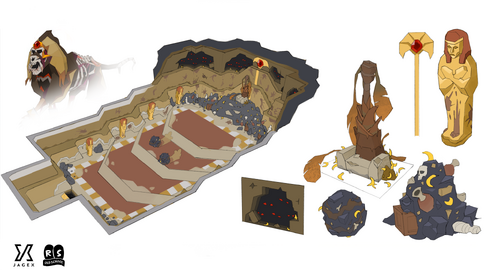 Concept art of Ba-Ba's room, by Mod Jerv.
 -
 Concept art of the Path of Scabaras, by Mod Jerv.
 -
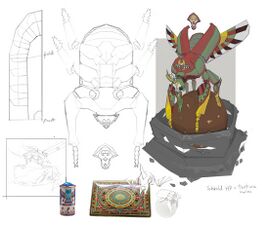
 Concept art of Kephri's room, by Mod Grub.
 -
 Concept art of the Path of Crondis, by Mod Grub.
 -
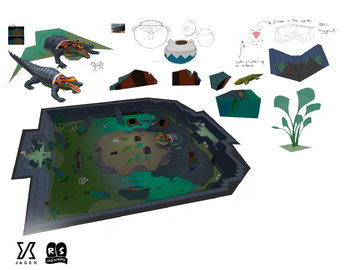 Concept art of Zebak's room, by Mod Grub.
 -
 Concept art of the Wardens' room, by Mod Jerv.
 -
 Concept art of the burial chamber, by Mod Jerv.


NPCs
-
 Concept art of Akkha, by Mod Grub.
 -
 Concept art of Ba-Ba, by Mod Grub.
 -
 Concept art of Kephri, by Mod Grub.
 -
 Concept art of Zebak, by Mod Grub.
 -
 Concept art of the Wardens, by Mod Grub.
 -
 Concept art of Ba-Ba's baboons, by Mod Jerv.
 -
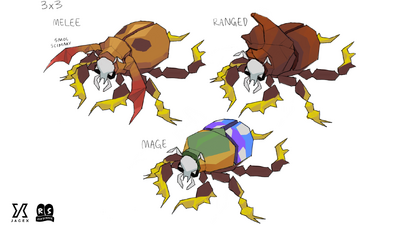 Concept art of Kephri's children, by Mod Jerv.
 -
 Concept art of the Avatars of Tumeken, by Mod Jerv.
 -
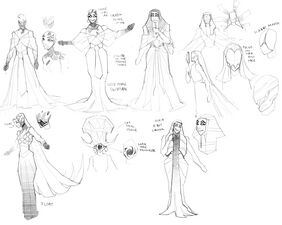
 Concept art of Amascut, by Mod Jerv.
 -
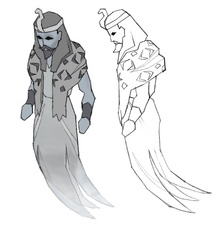 Concept art of Osmumten, by Mod Jerv.
 -
 Some early ideation sketches of Amascut, by Mod Jerv.
 -
 An earlier concept of the Avatars of Tumeken, by Mod Jerv.
 -
 Some early ideation sketches of the bosses made during a brainstorming session between Mod Jerv and Grub.


Developers
- Main developer(s): Mod Arcane, Mod Ed, and Mod Mack
- Quality Assurance: Mod Curse, Mod Halo, and Mod Moogle
- Art: Mod Ry, Mod Brow, Mod Jerv, Mod Ghost, Mod Grub, Mod Skylark, Mod Soffan, and Mod West
- Audio: Mod Lord, Mod Grace, Mod Slippers, and Mod Surma
Trivia
- On release, a competition was held for the first teams to complete a Normal Mode and Expert Mode raid, with winners receiving 12 months of membership. The winners were announced on 16 September 2022:[5]
Mode Winner(s) Normal Mode Rovint, Oblv Yuumi, Oblv Poenari, 54N Kappa, Animeme, Hardesnikkel, Kanao Expert Mode Oblv Jraze
- The Tombs of Amascut is the only raid that:
- Has a different purple indicator, with Osmumten's sarcophagi glowing purple instead of the chest, which is instead opened for that player.
- Has their boss pet have reskin(s) that does not require the raid to be completed in a set amount of time.
- Does not provide extra bonuses for completing a raid on time.
- The Jungle Japes invocation is likely a reference to the first level of Donkey Kong 64 by the same name.
See also
References
| NPCs |
| ||||||||||||||||||||||||||||||
|---|---|---|---|---|---|---|---|---|---|---|---|---|---|---|---|---|---|---|---|---|---|---|---|---|---|---|---|---|---|---|---|
| Bosses |
| ||||||||||||||||||||||||||||||
| Items |
| ||||||||||||||||||||||||||||||
| Rewards |
| ||||||||||||||||||||||||||||||
| Scenery | |||||||||||||||||||||||||||||||
| Music | |||||||||||||||||||||||||||||||
| Related |
| ||||||||||||||||||||||||||||||
| NPCs | |
|---|---|
| Enemies | |
| Items | |
| Locations | |
| Music | |
| Related | |